 A Sopwith Triplane built in Meccano by one of our players in 1:20 scale.
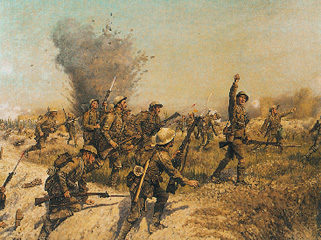 Battle of the Somme - Ulster Division.
The Desert Column is a computer moderated miniatures wargames system for Word War I. It is aimed at increasing the historical realism of tabletop miniatures games while reducing the rule complexity, thus allowing the player to concentrate on the tactical and strategic issues.
We are always looking for ideas from players as to what to include or change. It is a "for wargamers by wargamers approach" with the system being sold at minimum cost to encourage computer based gaming as a generally acceptable approach. New versions are being developed on an ongoing basis.
The new Version allows you the ultimate in army, battle and campaign size. There is no limit on the number of units or officers in an army! Battles can have any number of sides and any number of armies on each side! This accomodates even the largest club campaign game. Desert Column also provides the enhanced Windows usability that allows greater ease of use and faster play without the PC intruding into the players awareness.
There are two main parts to the tactical component of the system, a setup module and a battle module. The first allows you to set up your army and the second allows you to play a battle. In the Setup module units are given a number of characteristics including but not limited to:-
Back to Top
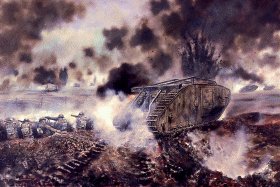 Mark IV Tank V's A7V Tank (German).
The Create Army module creates each army separately so that at battle time each army only need selected when you need it. At the start of a battle The Desert Column asks you for the number of sides and the number of armies on each side. This gives you the flexibility to play any army you have against any (or all!) others. You don't have to associates opponent armies at the time when you create them. When in the Create Army module you may save your data at any time. You will also be prompted to save your data once you exit or open another army. Armies may be as large as you like now. Some of the main data elements used to describe units and officers are:-
Name. Up to 40 characters per unit or officer is allowed so that longer names can be accomodated and the historical 'feel' preserved;
Trooptype. A wide range covers most types of infantry, mounted troops, tanks, vehicles, artillery, special weapons groups and naval types (Battleships, Battlecruisers, Armoured Cruisers, Submarines etc) . Aircraft are represented as generic types (eg fighter, dive bomber) as they provide support to ground and naval forces;
Training Level. This ranges over a five point scale from Ill Train ed to Highly Trained.
Size of Unit A unit would have the number of troops in it and can be further sub-divided into a number of subunits or elements to allow fire or melee to be split or to represent historical subdivisions such as individual tanks within a tank squadron or companies within a Battalion. Units may be split to form new units as well as combined.
Weapon types. This includes a large range of options including small arms, machine guns, field and naval artillery of many different calibres. Fixed Position artillery such as Big Bertha are also included.
Armour. Tanks and naval vessels have the option for the player to vary the depth of armour at different points. On tanks this includes front, side and several other points. On Naval vessels it includes decks, turrets, internal armoured belts, waterline belts and so on. Both maximum and minimum depths of armour may be specified so as to allow the representation of weak points. In battle the system determines the point hit, the armour depth at that point and whether the round penetrates. Rounds do not necessarily penetrate as the angle may dictate a ricochet.
Tactical Style. Even within the same army and nationality, units vary greatly in their battlefield behaviour since they are composed of troops drawn from widely varying backgrounds. This is allowed for by the use of the Tactical Style feature, which gives the unit a different battlefield behaviour pattern. The Tactical Styles accomodated in this period include Regulars, Irregulars, Civilian, Shock Troops and others.
Although most troops are Regulars in this period, some such as Cossack Guerillas could be classed as Irregulars. The documentation accompanying The Desert Column advises on the characteristics of each Tactical Style. The option is provided to give players the freedom to express their historical view of their favourite army.
Morale and Fatigue can be preset before a battle to match historical circumstances such as prebattle forced marches or a prior loss/victory in a campaign.
Flank March arrival times are also preset before battle, although the arrival depends on a number of historical factors such as the commander's ability and the capacity of the troops he is commanding.
Generals and their orders also receive full attention as the officers personality, efficiency, orders and place in the chain of command is established. Each force has up to 5 command levels which could represent CNC, Corps, Divisional, Brigade and Regimental level commanders, with Battalions at the unit level. How many levels are used is at the players discretion. The interaction between these commanders and the resulting effect on units is controlled by the flow of orders and the officer characteristics. At particular points in the battle (eg recovering from being suppressed by enemy fire) these factors are taken into account by the system in determining the outcome. This allows quite complex evaluations of unit behaviour without any extra burden on the player.
The Battle module has four phases.
 Australian Light Horse at Beersheba - The Last Great Cavalry Charge.
Optional effects such as weather, ammunition supply and time of day (eg to support night or dawn actions) can be switched on or off. This allows the effect of dazzle and obscured targets to be introduced in any game.
1. Deployment. At the start of each round use the Deployment Phase to perform all the actions that are preliminary to combat, such as change of tactical posture, sending Orders, testing for Charges and testing for other events such as a unit's success at scouting or movement through difficult terrain. You should think carefully about your tactics before you issue directions. For example, if a command has been on the defensive (with Hold Orders) and the enemy attack is faltering, you may decide to attack soon. Think ahead and send an Attack order some rounds in advance. Once the order arrives and you want to encourage the men to assault an enemy position, then send their commander to join the key unit BEFORE you test for the assault. Sending him afterwards will be too late. Remember to allow some margin for delays and errors such as a misinterpretation of Orders. This is part of the "fog of battle" built into The Desert Column. You will find that it is quite a challenge to control a battle even with modern aids such as direct radio contact. It gives the sensation of how it must have been and you may feel more sympathy for generals of those times after the experience.
A unit that has been involved in a test to assault will not be given a result immediately. This will be given once you move to the next phase (Area Fire). The reason for the delayed notification is that the unit may be involved in more than one charge and these may be against different types of targets. Consequently the total situation needs to be evaluated before the decision can be made on whether the unit charges, stands, runs etc. The total situation is only available once the Deployment phase is concluded.
After players have finished Deploying, choose the next phase, which is Area Fire.
2. Area Fire. By 'Area Fire' we refer to a situation where a unit fires on an area suspected on containing enemy troops. The fire is not direct fire on a known enemy. A unit engaging in area fire may cause fire to fall on several units during the one turn, each at a different range and with different cover characteristics and ordinance types (eg Shell or Shrapnel). The more units that are fired on the more thinly spread is the effect of the fire and the less damage done to each target unit.
Area Fire is simultaneous and the effects of firing are not applied until the start of the next bound.
3. Direct Fire. For Direct Fire, the player chooses the unit from the drop down list, chooses the target and adjust the target conditions (ie range, cover type etc). Then clicks on the Fire button at the bottom of the form. The losses resulting will be displayed immediately. If a unit is firing on more than one target then the player can split the fire according to the number of elements remaining in the unit.
The effects of Direct Fire are immediate in this period. This is due to the greater potential lethality of modern weapons. Consequently the choice of who can fire first is determined by the system and all units are displayed in order of initiative. Those with highest initiative being more likely to be able to fire first, although there are random effects that may allow other units with lower initiative to gain the advantage. Factors such as troop training, morale, fatigue and command and control factors influence whether a unit can get a higher initiative rating. As a unit is worn down by combat it tires or loses morale and its initiate tends to decline. Armoured units and vessels are also given an initiative rating, but are not so influenced by morale and fatigue.
4. Melee. At the start of melee, those units that have successfully tested to charge will be tested for charging home on the target in the light of the effect of any firing on them. Some may have taken unacceptable losses and may recoil without contacting their opponent. When fighting more than one target you may split the combat according to the number of elements that are available to fight.
Units that have been involved in a melee will only be given a broad interim outcome at the time of combat. The final outcome will be given once you cycle back to the first phase (Deployment). The reason for the delayed notification is that the unit may be involved in more than one melee and these may be against different types of targets. Consequently the unit may win against one but lose against another. Therefore the total situation is evaluated for you before the decision is made on whether the unit wins, loses, stands, runs etc. Then the position of the unit on the tabletop would be changed according to the outcome shown by The Desert Column.
Grand Tactical module is included at no extra cost.
The Grand Tactical module allows you to play against one or more opponents in the aproach moves that lead to a battle. The players deploy their commands in a landscape with terrain generated by the computer and then move towards a tabletop area marked in the centre of the table. During this Grand Tactical movement, commander ability, encounters with the enemy, difficult terrain and the excessive crowding of friendly commands can all contribute to delays and mishaps. When enough commands have entered the tabletop area the system declares the battle ready to start and exports the armies ready for battle. Commands that have not reached the tabletop area are set to flank march and appear later during the battle (you hope!). A Tactical Map of the battlefield with computer generated terrain and initial starting point for each command is provided for you to print and use as an aid to initial deployment. You now import the armies into the battle module and you are ready to fight the battle!
A Solo module is included at no extra cost.
The Solo module allows you to play against the system using a number of scenarios. Responses considered typical of an historical general are provided by the Solo module and are displayed for the gamer to act upon. The amount of activity needed at the screen is reduced as the Solo system handles all formation and order changes within the PC. The player does not need to perform these as well as those needed for his own side. Player intervention in the Solo side's activities is allowed however, so that inappropriate responses can be corrected.
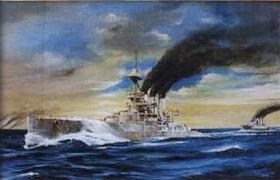 HMS Tiger - Dogger Bank.
Naval rules have now been integrated with the existing land based rules. This provides the player with the opportunity for amphibious battle scenarios as well as either land or naval actions. In other words the player can either play the same land based games as before, or play a conventional naval game, or play a combined arms action in which both naval and land forces are present and can fire on each other as well as ram and board.
Each bound the system recalculates the maximum turn and speed of each vessel based on a number of factors such as the crew's training level, damage sustained to key areas such as the engine room as well as the success of damage control and the state of the ship. The damage inflicted by enemy fire includes the efect on specific areas such as conning tower or engine room as well as general damage such as flooding and fire. The effectiveness of damage control in stopping these problems is reassessed each turn by the system. Under heavy fire a captain may surrender the ship or the vessel could be destroyed by fire.
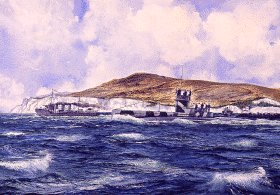 E-11 Off Dardanelles.
A wide range of naval guns and torpedos are provided to allow the vessel to be armed historically. A wide range of ship types is also provided, including Battleships, Armoured Cruisers, Destroyers, Submarines and merchant ships.
To add to the realism, several kinds of fortifications have been added to the already extensive range of troop types. These can be armed with artillery and are assumed to have their own garrison. These forts act as fixed strong points that can bombard or suffer bombardment, as well as resist or be overrun by storming parties. The forts range from hastily fortified positions to heavy stone forts. A cluster of these strong points can be used to represent the aggregation of strong points (bastions) that compose any major fortification.
A Sopwith Triplane built in Meccano by one of our players in 1:20 scale.
 Another view of the Sopwith Triplane.